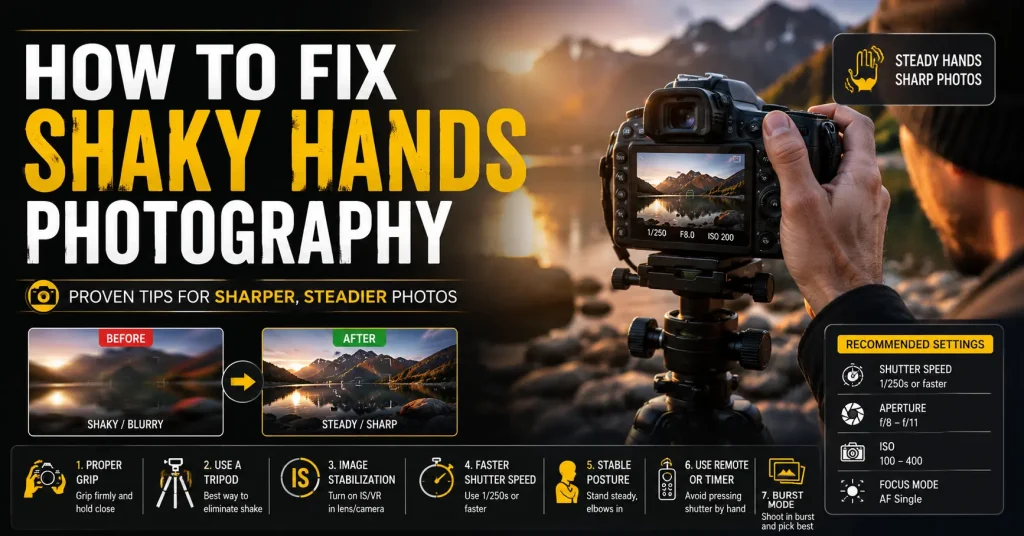

How to Fix Shaky Hands in Photography: A Complete Expert Guide
If you’ve ever reviewed a photo and noticed it looks slightly blurred even though your subject was perfectly still you’ve likely experienced the effects of camera shake. This is one of the most common challenges photographers face, especially beginners or anyone shooting in low light or using zoom lenses.
Understanding how to fix shaky hands in photography is not just about holding the camera tighter. It involves a combination of proper technique, camera settings, posture, breathing control, and sometimes even equipment upgrades. The good news is that with the right approach, you can dramatically reduce or completely eliminate blur caused by hand movement.
In this guide, we’ll break down practical, field-tested strategies used by professional photographers to achieve consistently sharp images even without a tripod.
What Causes Shaky Hands in Photography?
Before fixing the problem, it’s important to understand what causes it.
1. Natural Hand Movement
Even the steadiest hands naturally move slightly. When shooting at slower shutter speeds, this movement becomes visible in the final image.
2. Low Shutter Speed
The slower your shutter speed, the longer your camera is exposed to motion. Even tiny hand movements get recorded as blur.
3. Zoom Lens Amplification
Using telephoto lenses magnifies both the subject and your hand movement. The longer the focal length, the more noticeable shake becomes.
4. Poor Shooting Posture
Standing incorrectly or holding your camera without support increases instability.
5. Fatigue or Physical Conditions
Fatigue, stress, caffeine, or even conditions like essential tremor can affect steadiness.
How to Fix Shaky Hands in Photography (Proven Methods)
1. Master the Proper Camera Grip
One of the simplest yet most overlooked solutions is improving how you hold your camera.
The correct grip technique:
- Hold the camera with your right hand on the grip
- Support the lens with your left hand underneath
- Keep elbows tucked into your body
- Avoid holding the camera away from your face
This creates a stable “triangle structure” that reduces movement significantly.
Pro Tip: Think of your body as a tripod your elbows and torso should act as support points.
2. Use the Right Shutter Speed (Critical Factor)
If there’s one technical adjustment that immediately improves sharpness, it’s shutter speed.
Safe shutter speed rule:
Use a shutter speed equal to or faster than your focal length.
For example:
- 50mm lens → 1/60 sec or faster
- 100mm lens → 1/125 sec or faster
- 200mm lens → 1/250 sec or faster
If you’re still getting blur, increase the shutter speed further.
When to go even faster:
- Low light environments
- Telephoto zoom shooting
- Action or street photography
3. Enable Image Stabilization (IS / VR / OSS)
Modern cameras and lenses often include built-in stabilization systems.
Types of stabilization:
- Lens-based stabilization (Canon IS, Nikon VR, Sony OSS)
- In-body stabilization (IBIS) found in many mirrorless cameras
What it does:
It compensates for small hand movements, allowing slower shutter speeds without blur.
Important: Stabilization helps, but it does not freeze subject motion only camera shake.
4. Improve Your Shooting Posture
Your stance plays a huge role in stability.
Stable shooting position:
- Feet shoulder-width apart
- One foot slightly forward
- Knees slightly bent
- Lean into your shot for balance
Extra support techniques:
- Rest elbows against your chest
- Lean against walls, trees, or poles
- Sit or kneel when possible
Even a slight improvement in posture can drastically reduce blur.
5. Control Your Breathing
This is a professional trick many beginners overlook.
How to use breathing for stability:
- Take a deep breath
- Exhale slowly
- Press the shutter at the end of exhalation
This reduces micro-movements in your upper body.
For critical shots, some photographers even hold their breath briefly while capturing the image.
6. Use Burst Mode for Higher Success Rate
Burst mode takes multiple shots in quick succession.
Why it helps:
- Increases chances of a sharp frame
- Reduces impact of single shaky moment
- Useful for street, wildlife, and travel photography
Even if a few images are blurry, you’ll likely get at least one perfectly sharp shot.
7. Increase ISO Instead of Slowing Shutter Speed
Many beginners avoid raising ISO due to noise concerns, but modern cameras handle it well.
Why higher ISO helps:
- Allows faster shutter speeds
- Reduces motion blur
- Improves handheld shooting stability
Example:
Instead of shooting at:
- ISO 100, 1/30 sec (blur risk)
Try:
- ISO 800, 1/125 sec (sharp image)
A slightly grainy photo is better than a blurry one.
8. Use a Faster Lens (Wide Aperture)
Lenses with wide apertures let in more light.
Benefits:
- Faster shutter speeds
- Better low-light performance
- Reduced reliance on stabilization
Examples:
- f/1.8, f/1.4 lenses are ideal for handheld shooting
9. Upgrade to Stabilizing Equipment
While technique is key, gear can make a big difference.
Helpful equipment:
- Monopods (great for mobility + stability)
- Tripods (best for long exposure)
- Gimbals (for video or moving shots)
- Grip straps and camera cages
If you frequently shoot in low light or telephoto ranges, investing in support gear is worth it.
10. Train Your Hands for Stability
Yes your hands can actually become steadier over time.
Exercises:
- Hold a lightweight object at arm’s length for 30–60 seconds
- Practice slow breathing while keeping hands steady
- Use a camera daily to build muscle memory
Professional photographers often develop steadiness through repetition, not just gear.
Common Mistakes That Make Shaky Hands Worse
Avoid these habits if you want sharper images:
- Shooting at very slow shutter speeds without support
- Using zoom lenses without stabilization
- Holding camera away from your body
- Relying only on autofocus or stabilization
- Ignoring posture and breathing
Fixing even one of these can improve your results dramatically.
Quick Cheat Sheet: How to Fix Shaky Hands in Photography
If you need instant results, follow this:
- Increase shutter speed
- Tuck elbows in
- Use image stabilization
- Increase ISO if needed
- Stabilize against a solid object
- Shoot in burst mode
- Exhale before pressing the shutter
Advanced Tips for Professional-Level Sharpness
1. Use Electronic Shutter (Mirrorless Cameras)
Reduces internal vibration from mechanical movement.
2. Remote Shutter or Timer
Prevents shake caused by pressing the shutter button.
3. Mirror Lock-Up (DSLR users)
Reduces vibration caused by mirror movement.
4. Pre-focus Your Shot
Avoids unnecessary movement while half-pressing the shutter.
When Shaky Hands Might Be a Medical Issue
In some cases, persistent hand tremors may not be just technique-related.
If you notice consistent difficulty even with proper technique and fast shutter speeds, consider:
- Fatigue or stress
- Excess caffeine intake
- Essential tremor or other conditions
If needed, consult a medical professional for advice.
Conclusion
Learning how to fix shaky hands in photography is less about expensive gear and more about mastering technique, awareness, and camera settings. By combining proper posture, controlled breathing, correct shutter speed, and smart use of stabilization tools, you can eliminate most blur caused by hand movement.
The key is consistency. The more you practice these habits, the more natural they become and the sharper your photos will be without relying on a tripod every time.
Sharp photography is not luck. It’s control.
FAQ: How to Fix Shaky Hands in Photography
Why are my photos blurry even when I hold the camera still?
Because even small hand movements are amplified at slow shutter speeds or long focal lengths.
What is the best shutter speed to avoid camera shake?
A general rule is 1/focal length or faster, but faster is always safer.
Does image stabilization completely remove shake?
No. It reduces camera shake but cannot fix subject movement or extremely slow shutter speeds.
Is a tripod always necessary?
No. Proper technique and settings often eliminate the need for a tripod in everyday photography.
How can beginners quickly improve sharpness?
Increase shutter speed, improve grip, and use burst mode—these three changes give immediate results.